
DIY Ceramic Coating vs Professional: Which Option is Right for You?
Your vehicle’s paint deserves long-lasting defense against daily wear. While traditional waxes offer temporary shine, modern solutions bond chemically with surfaces for semi-permanent protection. This advanced technology creates an invisible shield that repels water, dirt, and contaminants effortlessly.
Ultraviolet rays and road debris gradually degrade your car’s appearance. The latest protective formulas block harmful UV radiation, minimizing fading risks. Their scratch-resistant qualities also help maintain that showroom-ready look through seasons of driving.
What sets these innovations apart? Unlike waxes that sit on top of paint, they form molecular bonds with clear coats. This creates a resilient layer that lasts years rather than months. Maintenance becomes simpler too; water beads up and rolls off, taking grime with it.
Once reserved for professional detailers, this technology now comes in user-friendly kits. With proper preparation and technique, achieving a mirror-like finish at home is entirely possible. Our guide will walk you through each step, from surface prep to final curing.
Key Takeaways
- Modern protection bonds chemically with paint for extended durability
- Hydrophobic properties reduce cleaning time and effort
- Blocks UV rays to prevent color fading and oxidation
- Resists minor scratches and environmental contaminants
- Home application kits deliver professional-grade results
Understanding the Benefits of Ceramic Coating for Your Vehicle
Advanced protective technologies now offer multi-year resilience for car exteriors. These solutions bond at a molecular level with your vehicle’s clear coat, forming a durable shield against environmental hazards. Unlike traditional waxes that wear off quickly, this approach maintains its strength through countless washes and weather conditions.
Enhanced Protection and Longevity
Your car faces constant threats from UV exposure, acidic contaminants, and road debris. The protective layer acts like armor, deflecting 90% of ultraviolet rays that cause paint oxidation. It creates a measurable barrier, up to 2 microns thick – detectable with specialized gauges.
Common nuisances like bird droppings and tree sap slide off instead of etching into surfaces. Professional-grade formulas can safeguard your finish for a decade, while home-applied versions typically last 1-3 years. This outperforms conventional waxes that degrade within months.
Improved Gloss and Ease of Cleaning
Silicon dioxide compounds in the formula amplify reflectivity, giving paint a liquid-like depth. “The optical clarity makes colors pop like never before,” notes a detailing expert. Water beads up and rolls away instantly, taking dirt with it – cutting wash times by half.
Maintenance becomes effortless as the slick surface resists water spots and grime buildup. A quick rinse restores the showroom shine, preserving your vehicle’s appearance through seasons of use.
Gathering Essential Supplies for Your DIY Project
Proper preparation begins with selecting quality materials. High-grade solutions bond better with surfaces, ensuring lasting results. Kits designed for home use simplify the process with pre-measured components and clear instructions.
Choosing the Right Protective Solution Kit
Entry-level options balance affordability with performance. Look for SiO2-based formulas (60-80% concentration) that offer 1-3 years of protection. Reputable brands like Armor Shield IX and Adam’s Polishes include applicator pads and premium microfiber towels.
| Feature | Entry-Level | Professional-Grade |
|---|---|---|
| Price Range | $50-$100 | $150-$300 |
| Durability | 12-36 months | 5+ years |
| Accessories Included | Basic applicators, 2-3 towels | Multiple pads, surface prep solutions |
Necessary Tools and Safety Equipment
Prioritize lint-free microfiber cloths (300-500 GSM) to prevent swirl marks. Essential items include:
- Foam applicator blocks for even distribution
- Nitrile gloves to protect hands
- Isopropyl alcohol for final surface prep
Work in shaded, well-ventilated areas to ensure proper curing. “High GSM towels remove excess product without scratching,” advises professional detailer Mike Phillips.
Preparing Your Car for Ceramic Coating Application
Proper vehicle preparation determines how well protective treatments bond with your car’s exterior. Rushing through this stage often leads to premature failure of the protective layer. Three critical steps form this foundation: meticulous washing, deep decontamination, and surface refinement.
Thorough Washing and Pre-Cleaning
Start with a high-pressure rinse to blast away loose dirt and road grime. Use a foam cannon to apply pH-neutral soap, letting it dwell for 5-7 minutes to soften stubborn particles. The two-bucket method prevents swirl marks – one for clean soapy water, another for rinsing your wash mitt.
Dry the vehicle completely using a microfiber drying towel. Even freshly cleaned surfaces harbor microscopic contaminants. “Water spots or leftover residues create adhesion issues,” warns detailing specialist Lisa Matthews.
Utilizing a Clay Bar for Surface Perfection
Clay bars remove embedded pollutants that regular washing misses. Glide the lubricated clay across panels using light pressure; you’ll feel roughness disappear as contaminants transfer to the bar.
| Clay Type | Best For | Lubricant Required |
|---|---|---|
| Mild | Light contaminants | Quick Detailer |
| Medium | Road tar, overspray | Clay Lubricant |
| Aggressive | Heavy industrial fallout | Heavy-Duty Prep Spray |
Test surface smoothness by placing a plastic bag over your hand. If the paint feels gritty, repeat the claying process until it glides effortlessly.
Step-by-Step Guide to Applying the Ceramic Coating
Proper technique transforms good results into exceptional ones. Start by dividing your vehicle into manageable 3×3-foot areas. This approach prevents premature drying and ensures uniform coverage across curved panels.
Mastering the Application Process
Prime your applicator pad with 10 drops for the first section. Use straight-line strokes in overlapping cross-hatch patterns. Subsequent areas need only 4-5 drops; over-saturation causes uneven curing.
Watch for visual cues as you work. A rainbow sheen appears within 30-60 seconds, signaling bonding completion. Detailer Sarah Collins notes: “Missing this window leads to hazy residues. Swift leveling ensures flawless clarity.”
| Stage | Key Action | Time Limit |
|---|---|---|
| Initial Spread | Cross-hatch application | 20 seconds |
| Bonding Phase | Rainbow effect observation | 30-60 seconds |
| Final Buff | Microfiber towel polishing | Immediate after leveling |
Maintain consistent pressure during buffing. High-gloss finishes emerge when all excess product gets removed. Work methodically from roof to sides, finishing with lower body panels to avoid accidental contact.
ceramic coating DIY Techniques and Tips
Mastering professional techniques elevates your vehicle’s finish from temporary protection to long-term brilliance. Precision in execution determines whether your efforts yield a flawless shield or patchy results. Let’s explore two critical elements that separate exceptional outcomes from amateur attempts.
Overlapping Strokes and Curing Times
Overlap each stroke by 50% to eliminate gaps in coverage. Work in vertical then horizontal patterns, creating a crosshatch effect. This approach prevents thin spots that compromise durability.
Environmental factors dramatically affect bonding speed. High humidity slows evaporation, while heat accelerates it. Adjust your rhythm using this guide:
| Temperature | Humidity Level | Work Time |
|---|---|---|
| 60–75°F | 40–60% | 45–60 seconds |
| 75–90°F | 20–40% | 30–45 seconds |
| Below 55°F | Above 70% | Not Recommended |
Maintaining a Consistent Application Method
Develop a repeatable pattern starting from the roof. Use identical pressure across all panels – imagine holding a raw egg without breaking it. “Rushed motions create uneven layers,” warns auto care specialist Jenna Rivera.
Follow these quality checks:
- Inspect each section under angled light before curing
- Rotate microfiber towels frequently to prevent residue transfer
- Mark completed areas with painter’s tape
Make sure to maintain tool cleanliness throughout the process. Wipe applicators with isopropyl alcohol between panels to avoid contamination. Consistent habits yield professional-grade results that withstand weather extremes and daily wear.
Tips for Using Clay Bars and Polishing Your Vehicle
Achieving a flawless finish starts with surface perfection. Hidden contaminants and microscopic flaws sabotage protective treatments before they’re applied. Two processes ensure optimal bonding: mechanical decontamination and optical refinement.
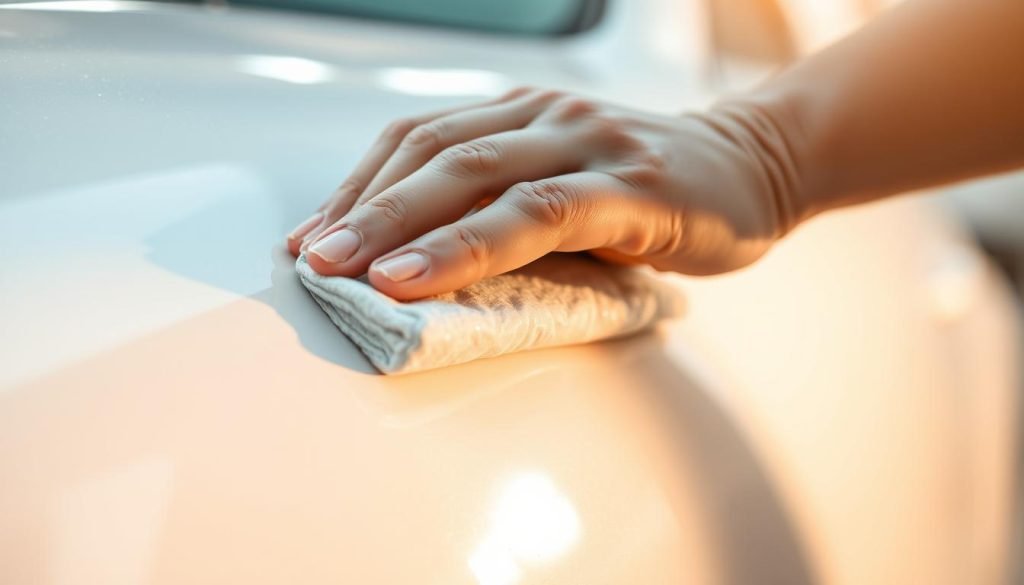
Benefits of Polishing Pre-Coating
Polishing transforms paint at the molecular level. It removes oxidation, water spots, and swirl marks that refract light unevenly. Smooth surfaces reflect 30% more light, creating deeper color saturation.
Three key advantages emerge:
- Eliminates imperfections that trap dirt
- Creates uniform texture for even product adhesion
- Restores 95% of factory gloss when done correctly
“A well-polished surface acts like glass,” explains auto refinish expert Marco Torres. “Protective layers bond tighter and last longer on mirror-smooth finishes.”
Best Practices When Using a Clay Bar
Clay bars work like magnets for bonded pollutants. Fold and knead the bar frequently to expose fresh surfaces. Always use a lubricant, quick detailer spray prevents marring.
| Clay Grade | Contaminant Type | Pressure Needed |
|---|---|---|
| Fine | Dust, pollen | Light touch |
| Medium | Rail dust, overspray | Moderate glide |
| Heavy | Industrial fallout | Firm passes |
Test smoothness after each pass using the plastic bag method. If your fingertips detect grit through the bag, repeat the process until surfaces feel slick. Rinse thoroughly before moving to the polishing stages.
How to Tackle Different Vehicle Surfaces
Modern protective solutions adapt to diverse automotive materials through specialized formulas. While sprayable options work across multiple areas, traditional versions demand tailored approaches for optimal bonding. Surface porosity and chemical composition dictate application methods and product selection.
Paint Protection Strategies
Automotive finishes vary between single-stage and clear-coated systems. Clear coats require less product per layer but need thorough decontamination first. Use crosshatch patterns with foam applicators, working in 2×2-foot sections for uniform coverage.
Test adhesion by spraying water after curing. Properly treated paint forms tight water beads that race off panels. Avoid overlapping cured areas to prevent texture differences.
Glass and Transparent Surfaces
Windshields benefit from hydrophobic treatments that improve wet-weather visibility. Apply in vertical strokes using microfiber wraps, focusing on wiper paths. Cure times shorten on glass – buff residues within 45 seconds to avoid haze.
| Surface Type | Product Type | Cure Time |
|---|---|---|
| Painted Metal | High-SiO2 Formula | 60-90 seconds |
| Tempered Glass | Quick-Cure Spray | 30-45 seconds |
| Textured Plastic | Low-Viscosity Gel | 120 seconds |
Plastic and Trim Considerations
Non-porous trim accepts standard solutions, while textured areas need gel-based products. “Always test hidden areas first,” advises detailer Tyler Reed. “Some plastics react to solvents in protective formulas.”
Use cotton swabs for tight crevices and vinyl wraps. Matte finishes require immediate buffing to maintain factory appearance. Reapply every 8-12 months on high-touch zones like door handles.
Managing Common Mistakes and Troubleshooting
Even careful projects can encounter challenges during protective treatment application. Early detection and quick action prevent minor issues from becoming permanent flaws. This guide helps you spot problems and implement fixes without restarting your entire project.
Identifying and Fixing Uneven Application
Streaks often appear as wavy lines under bright light. These occur when the product spreads too thin or dries unevenly. Check each section at a 45-degree angle before moving to new areas.
For fresh errors, gently buff with a clean microfiber towel. If the layer has cured, use a finishing polish with light pressure. Work in circular motions until the surface regains uniform clarity.
| Issue | Detection Method | Correction |
|---|---|---|
| Thin Spots | Water beads flatten | Reapply to affected area |
| Overlapping Lines | Visible texture changes | Machine polish + reapplication |
| Hazy Patches | Cloudy reflections | Alcohol wipe + hand buffing |
Removing High Spots and Residue Issues
High spots feel rough and create distorted reflections. These raised areas form when excess material isn’t removed during the flash period. Tackle them within 48 hours for easier removal.
Use a dual-action polisher with a soft pad for best results. Start with 3000-grit compound, then refine with 5000-grit. “Always test correction methods on inconspicuous areas first,” advises auto refinish technician Greg Owens.
| Severity | Tool | Time Required |
|---|---|---|
| Mild | Hand applicator | 10 minutes per panel |
| Moderate | DA polisher | 15-20 minutes |
| Severe | Wet sanding | Professional recommended |
Make sure your workspace stays dust-free during corrections. Keep surfaces slightly cooler than the ambient temperature to slow chemical reactions. Most errors can be fixed through careful refinishing, and patience yields professional-looking outcomes.
Aftercare and Maintenance for Long-Lasting Results
Preserving your vehicle’s showroom finish requires dedicated upkeep after treatment. The first 48 hours determine the foundation of your protective layer’s durability. Follow these guidelines to lock in that glossy shine for years.
Initial Curing and Protection Guidelines
Keep your car dry for two full days post-application. Water exposure disrupts the bonding process, creating weak spots. Park in shaded areas to prevent rapid evaporation and ensure even curing.
Temperature fluctuations during this period affect performance. Avoid driving in rain or through puddles. If contamination occurs, gently blot, don’t wipe, with a clean microfiber cloth.
Regular Washing and Detailing Techniques
Use pH-neutral shampoo when cleaning coated vehicles. Harsh chemicals degrade the protective layer over time. Always rinse thoroughly before washing to loosen surface debris.
Hand-washing beats automated systems. Brushless car washes still use aggressive detergents that strip protection. Dry with plush towels using patting motions instead of dragging across paint.
Maintain your investment with bi-weekly washes. Consistent care prevents dirt buildup that diminishes hydrophobic effects. Proper maintenance keeps water beading strong and surfaces slick for easier cleaning.