
How to Test an Alternator with a Multimeter Without Removing It
Learn how to test an alternator with a multimeter without removing it. This step-by-step guide shows home mechanics how to check charging voltage, identify common alternator problems, and determine if the alternator is working pro
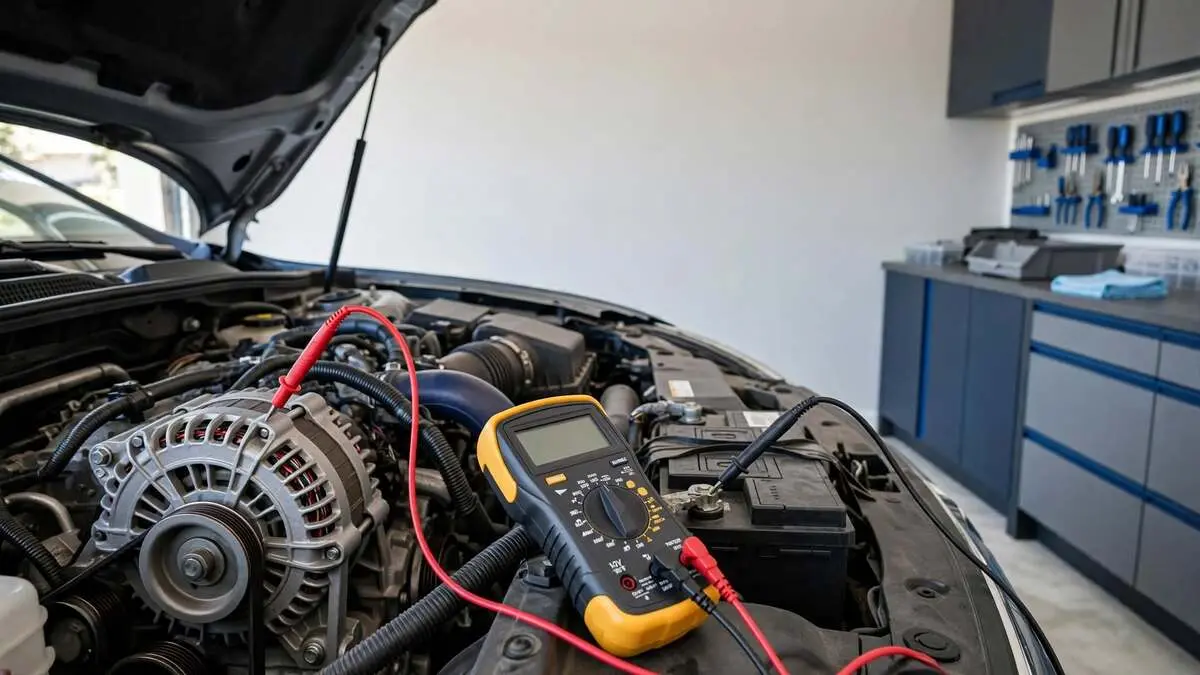
Quick Summary: You can test your alternator in place using a multimeter to check battery voltage at idle and under load, which can help reveal whether the charging system is working properly. This DIY diagnostic test takes about 10–15 minutes and costs $0–$20 if you already have a multimeter. No alternator removal or shop visit is required for this basic test.
Signs of a Bad Alternator
Before testing the alternator, look for symptoms that may indicate a charging-system problem:
- Battery warning light on the dashboard
- Dim or flickering headlights
- Electrical accessories working slowly or inconsistently
- Battery repeatedly going dead
- Difficulty starting the vehicle
- Whining, grinding, or unusual noises from the alternator area
- Electrical problems that become more noticeable at idle
- Engine stalling or poor electrical performance in severe cases
These symptoms do not automatically mean the alternator is bad. A weak battery, poor electrical connections, a slipping serpentine belt, or another charging-system problem can cause similar symptoms.
Tools & Parts Needed
| Item Required | Recommended Tool / Part | Primary Use |
|---|---|---|
| Digital multimeter | Auto-ranging digital multimeter (DMM) | Measuring DC voltage at the battery |
| Safety glasses | ANSI-rated safety glasses | Eye protection near a running engine |
| Gloves | Nitrile or mechanic’s gloves | Hand protection from heat and moving components |
| Owner’s manual | Vehicle-specific manual or online specification sheet | Confirming manufacturer charging specifications |
| Flashlight or headlamp | LED work light | Illuminating the battery terminals and engine bay |
| Wire brush (optional) | Battery terminal brush | Cleaning corroded terminals |
| Notepad or phone | Any note-taking app | Recording voltage readings |
Common Alternator Problems That Affect Charging
Several problems can cause abnormal charging voltage, even when the alternator itself is not completely failed.
- Weak or failing alternator diode: A damaged diode can cause excessive AC voltage ripple or unstable electrical output.
- Worn alternator brushes: Internal brush wear can reduce the alternator’s ability to maintain proper output, particularly at idle.
- Loose or worn serpentine belt: A slipping belt may prevent the alternator from spinning fast enough to produce sufficient output.
- Corroded or loose battery terminals: Poor connections can create voltage drops and make a healthy charging system appear faulty.
- Failing voltage regulator: A faulty regulator can cause undercharging or overcharging.
- Excessive electrical load: An aging alternator may struggle to maintain system voltage when headlights, the blower motor, rear defroster, and other accessories are operating simultaneously.
Step-by-Step Alternator Testing Guide
Step 1: Prioritize Safety First
Park on level ground, set the parking brake, and place the transmission in Park or Neutral, depending on the vehicle.
Keep hands, clothing, jewelry, and multimeter leads away from the spinning serpentine belt, pulleys, cooling fans, and other moving components.
Never disconnect the battery while the engine is running.
Step 2: Inspect the Battery Terminals
Visually inspect the positive and negative battery terminals for corrosion, looseness, or damaged connections.
If necessary, clean light corrosion with a battery terminal brush before testing. Poor connections can affect voltage readings and cause charging problems.
Step 3: Set Up Your Multimeter
Set the multimeter to DC voltage, usually represented by a V with a straight line.
If the meter is not auto-ranging, select a range that can measure at least 20 volts DC.
Place the red probe in the positive input and the black probe in the common/negative input according to the meter’s instructions.
Step 4: Test Resting Battery Voltage With the Engine Off
Make sure the engine and major electrical accessories are turned off.
Touch the red probe to the positive battery terminal and the black probe to the negative terminal.
A fully charged healthy automotive battery will typically measure around 12.6 volts, while approximately 12.4–12.7 volts is generally considered a normal resting range depending on battery condition and temperature.
A significantly lower reading may indicate that the battery is discharged or has another problem, so do not immediately blame the alternator.
Step 5: Start the Engine and Retest Voltage
Start the engine and allow it to idle.
Measure the voltage again at the battery terminals using the same probe positions.
On many conventional charging systems, a properly functioning alternator will raise system voltage to roughly 13.7–14.7 volts.
However, modern vehicles with smart charging systems may intentionally operate outside this range at certain times. Always compare your readings with the manufacturer’s specifications when available.
Step 6: Test Voltage Under Electrical Load
With the engine idling, turn on several electrical loads, such as:
- Headlights
- Blower motor
- Rear defroster
- Heated seats, if equipped
Check the voltage again.
A healthy charging system should generally maintain adequate voltage under load, but the exact target varies by vehicle and charging-system design.
A substantial or persistent voltage drop can indicate an alternator, belt, wiring, connection, or battery problem.
Step 7: Rev the Engine Slightly and Recheck
With the electrical accessories still operating, gently increase engine speed to approximately 1,500–2,000 RPM.
Watch the multimeter reading.
The voltage should remain reasonably stable rather than dropping sharply. Depending on the vehicle’s charging strategy, the voltage may increase, decrease, or fluctuate within a controlled range.
Step 8: Watch for Voltage Fluctuation or Ripple
Observe the multimeter reading for approximately 20–30 seconds.
A conventional charging system should generally produce a relatively stable DC voltage.
Significant or erratic fluctuations may indicate a problem with the alternator, voltage regulator, electrical connections, or diode system.
A standard DC-voltage reading alone cannot fully diagnose alternator ripple. A multimeter with an AC-voltage function or a dedicated charging-system test may provide additional information.
Step 9: Compare Readings to Manufacturer Specifications
Check the owner’s manual or manufacturer service information for the correct charging voltage range for your vehicle.
This step is especially important for vehicles equipped with smart or computer-controlled charging systems, where voltage can intentionally vary depending on battery state, temperature, electrical demand, and driving conditions.
Step 10: Record Your Results and Determine Next Steps
Write down your readings:
- Engine off
- Engine idling
- Electrical loads off
- Electrical loads on
- Around 1,500–2,000 RPM
If the readings are consistently outside the manufacturer’s specifications, further diagnosis may be necessary.
Do not automatically replace the alternator based on one abnormal reading. Check the battery, belt, terminals, wiring, and voltage-drop measurements as well.
How to Read Your Multimeter Results
Use the following values as general guidelines rather than universal specifications:
| Multimeter Reading | What It May Mean | Possible Next Step |
|---|---|---|
| Around 12.4–12.7V with engine off | Battery has a normal resting charge | Continue the charging-system test |
| Around 13.7–14.7V while running | Typical charging range on many conventional systems | Charging system may be operating normally |
| Below about 13.5V while running | Possible undercharging | Check alternator, belt, wiring, and battery |
| Voltage drops significantly under load | Charging system may not be keeping up | Perform additional charging-system tests |
| Above about 14.8V consistently | Possible overcharging | Check voltage regulator and manufacturer specifications |
| Large or erratic fluctuations | Possible charging-system or electrical problem | Perform further testing |
Important: These numbers are general guidelines. Modern vehicles with variable or smart charging systems can use different voltage strategies, so manufacturer specifications should take priority.
Alternator vs. Bad Battery: How to Tell the Difference
A weak battery and a failing alternator can produce similar symptoms, but the voltage readings can provide useful clues.
Engine Off
A healthy, fully charged battery will typically measure around 12.6 volts after resting.
If the battery voltage is significantly low, the battery may simply be discharged. It could also have a problem that requires further testing.
Engine Running
If the charging system raises voltage appropriately according to the vehicle’s specifications, the alternator is at least producing charging voltage.
If the voltage remains low while the engine is running, investigate the alternator, belt, wiring, connections, and charging-control system.
Battery Keeps Going Dead
If the alternator appears to charge correctly but the battery repeatedly loses charge, the problem may be:
- A weak or failing battery
- Parasitic electrical drain
- Poor battery connections
- Insufficient charging due to another electrical problem
A multimeter charging-voltage test cannot by itself prove that the battery is healthy.
When a Multimeter Test Isn’t Enough
A basic voltage test is useful, but it does not provide a complete diagnosis of every charging-system problem.
Additional testing may be necessary when the results are unclear, including:
- Battery load test to determine whether the battery can deliver sufficient power
- Voltage-drop test to check the positive and ground charging circuits
- Alternator output/current test to determine whether the alternator can produce sufficient current
- AC ripple test to identify possible diode problems
- Charging-system scan or professional diagnostic test on vehicles with advanced smart-charging systems
If the voltage readings are inconsistent or do not match the manufacturer’s specifications, avoid replacing expensive components based only on the basic multimeter test.
Safety Precautions: What NOT to Do
Working around a running engine requires extra care.
- Do not touch the serpentine belt or pulleys while the engine is running.
- Keep loose clothing, jewelry, and hair away from moving components.
- Do not short the battery terminals with the multimeter probes or metal tools.
- Do not disconnect the battery while the engine is running.
- Do not place your hands near an electric cooling fan, which can start automatically even when you are not expecting it.
- Avoid touching hot engine components immediately after driving.
- Use insulated, undamaged multimeter leads and follow the meter manufacturer’s instructions.
If you are uncomfortable working near a running engine, have the charging system tested by a qualified technician.
Cost Breakdown: DIY vs. Mechanic Shop
| Cost Category | DIY (Parts Only) | Mechanic Shop (Parts + Labor) |
|---|---|---|
| Multimeter (one-time purchase) | $15–$20 | N/A |
| Diagnostic labor | $0 (your time) | $50–$120 |
| Battery terminal cleaning supplies | $5–$10 | Usually included |
| Estimated Total | $0–$30 | $50–$120 |
Potential DIY savings: approximately $20–$120, depending on whether you already own a multimeter and what the shop charges for diagnostic work.
These are approximate figures and can vary by vehicle, location, and repair shop.
Frequently Asked Questions (FAQs)
What voltage indicates a bad alternator?
There is no single voltage that proves an alternator is bad on every vehicle.
On many conventional charging systems, a running voltage below approximately 13.5 volts or consistently above approximately 14.8 volts can indicate a charging-system problem. Significant fluctuations can also warrant further testing.
Always compare the reading with the manufacturer’s specifications, especially on vehicles equipped with smart charging.
Can I test my alternator without a multimeter?
You can perform a basic visual and symptom-based check, such as looking for a battery warning light, dimming headlights, or electrical problems.
However, these observations are not enough to accurately determine alternator output. A multimeter provides a much more useful initial diagnostic measurement.
Why does my alternator test fine but my battery still dies?
This can happen if the battery can no longer hold a charge, there is a parasitic electrical drain, or the battery terminals and cables have a poor connection.
A normal alternator voltage reading does not prove that the entire charging system or battery is healthy.
How long does an alternator typically last?
Many alternators can last roughly 80,000–150,000 miles, but lifespan varies considerably with vehicle design, climate, electrical demand, driving conditions, and maintenance.
A high electrical load, extreme temperatures, contamination, or belt problems can contribute to premature failure.
Can a multimeter test a bad alternator diode?
A standard DC-voltage test may reveal unstable charging behavior, but it cannot reliably diagnose every diode problem.
For a more definitive diagnosis, measure AC ripple with a suitable multimeter or use a dedicated charging-system tester.
Final Takeaway
Testing an alternator with a multimeter is a quick and inexpensive way to check whether your vehicle’s charging system is producing an appropriate voltage.
Start with the battery voltage engine off, then compare it with the voltage engine running, including a test under electrical load. If the readings are abnormal, check the battery, terminals, serpentine belt, wiring, and charging system before replacing the alternator.
For modern vehicles with smart charging systems, always use the manufacturer’s specifications rather than relying exclusively on generic voltage ranges.